
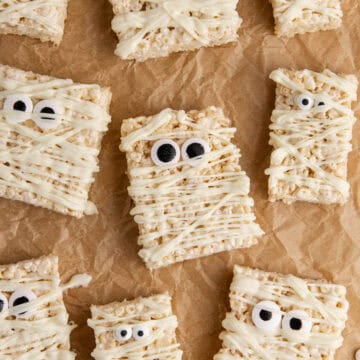
Mummy Rice Krispie Treats
These Mummy Rice Krispie Treats are chewy, sweet and topped with drizzled white chocolate "bandages" and candy eyes for a fun Halloween twist. A playful spin on the classic Rice Krispie treats, they're easy to make and even more fun to decorate.
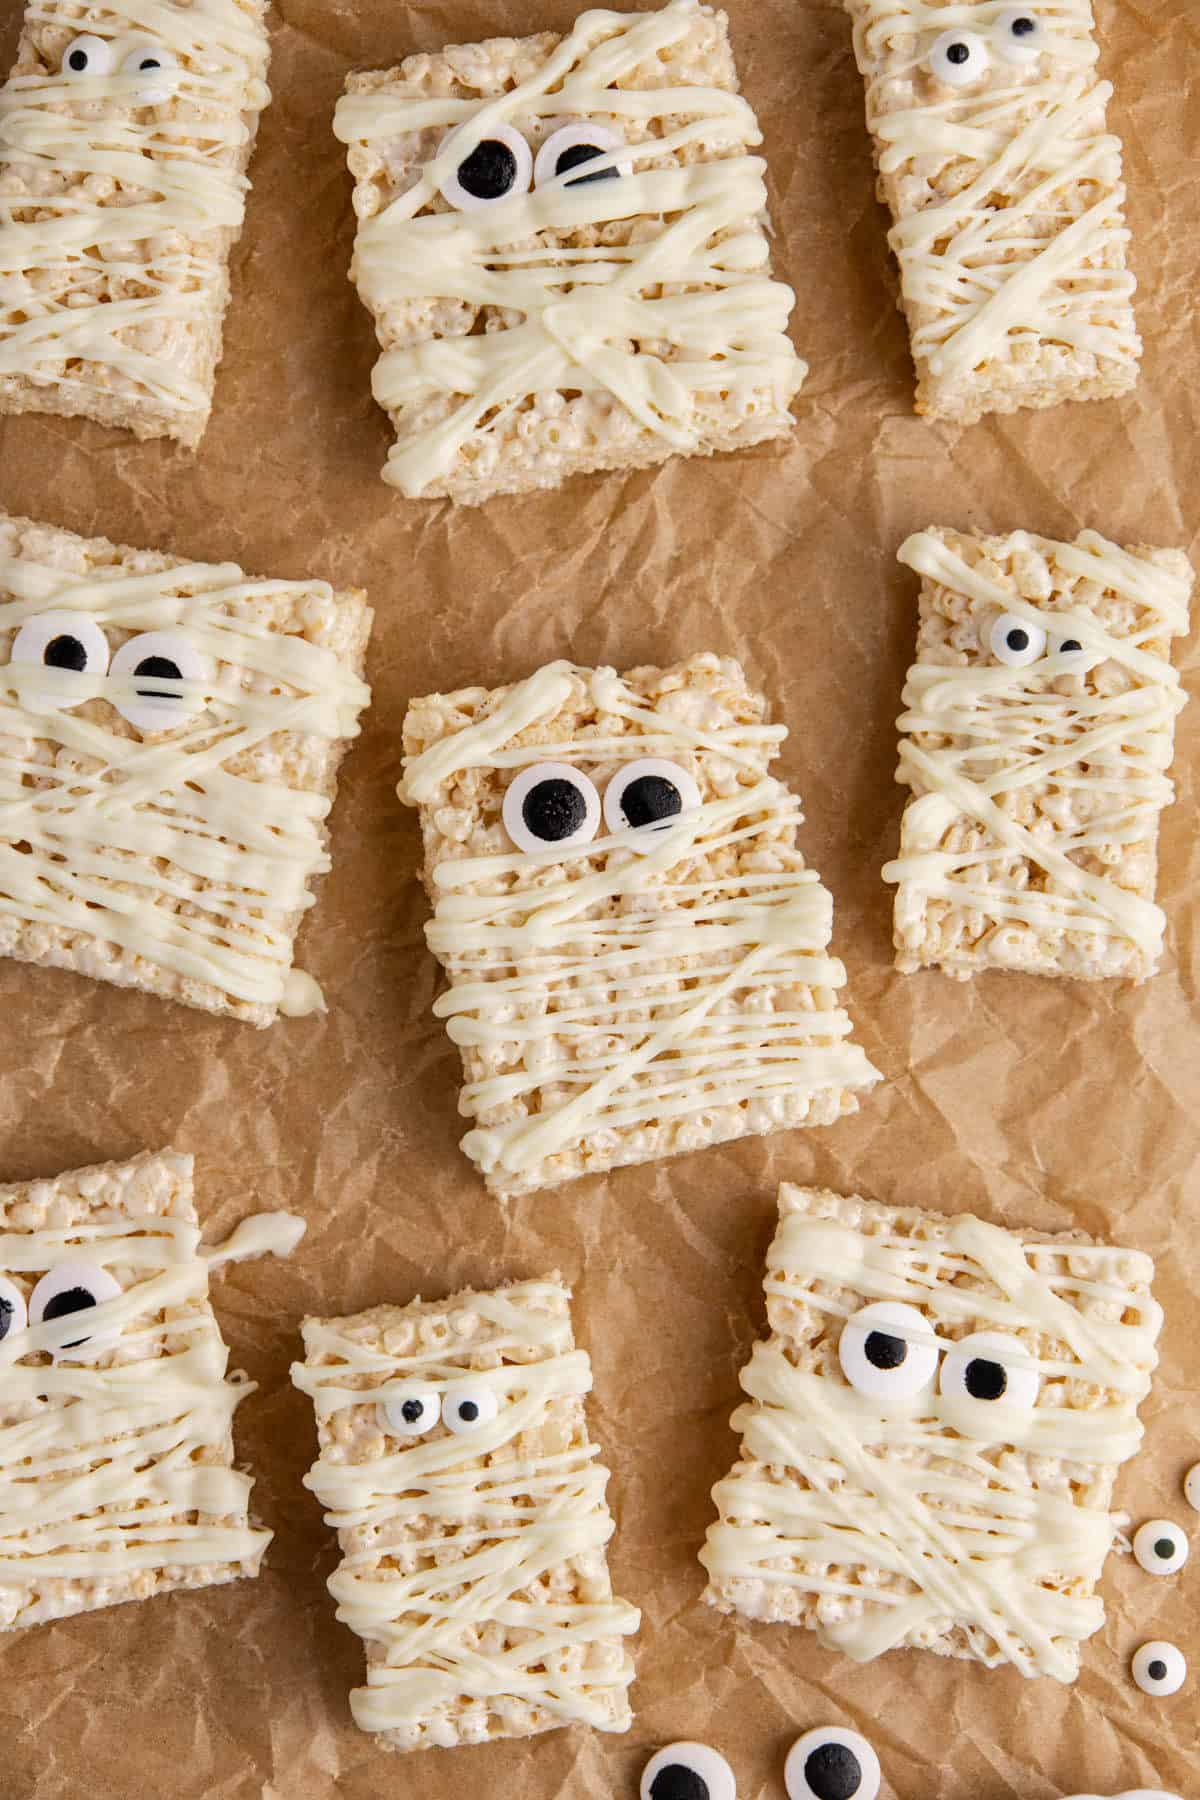
Perfect for Halloween parties, school parties or a spooky season family activity, these mummy treats are a festive Halloween dessert that comes together in no time with simple ingredients.
For more playful Halloween treats, try making a batch of our Mummy Brownies or Halloween Brownies.
Jump to:
Ingredients
These festive Halloween treats use classic Rice Krispie ingredients with a spooky upgrade.
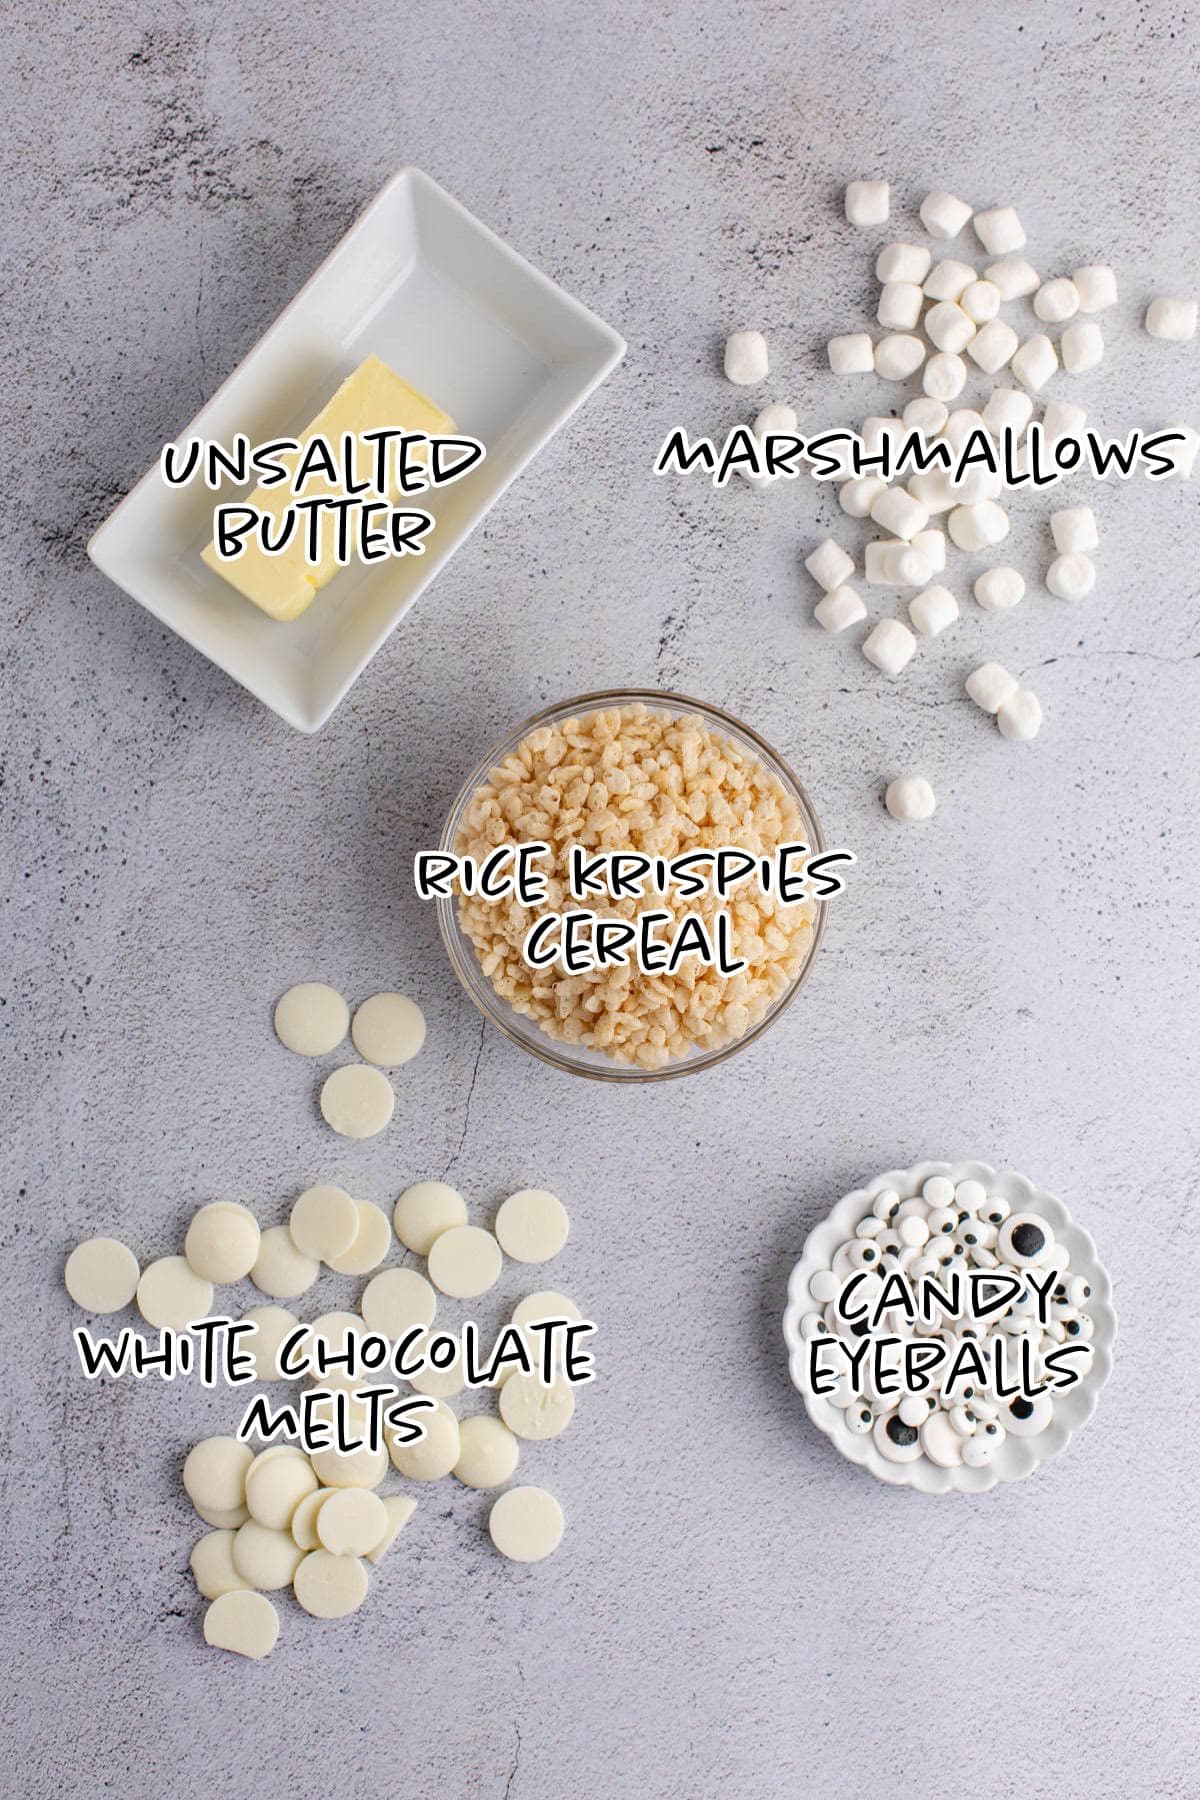
See the recipe card below for the exact quantities of each ingredient.
- Unsalted Butter: Melts with the marshmallows to form the base.
- Marshmallows: The sticky binder that makes crispy treats chewy and sweet.
- Rice Krispies Cereal: Creates the crunchy, crispy base.
- White Chocolate Melts: Used to drizzle mummy bandages and attach candy eyes.
- Candy Eyeballs: The fun finishing touch that makes these treats look like mummies.
Simplfy this recipe by having some parchment paper, piping bag and a 9x13 metal baking pan.
Variations
- Store-Bought: Buying pre-made treats for an even quicker shortcut.
- Brown Butter Base: Cook the butter longer for a nutty aroma and richer flavor.
- White Chocolate Subs: Swap candy melts for melted white chocolate chips or almond bark.
- On a Stick: Add lollipop sticks to turn them into grab-and-go mummy treats.
- Flavor Boost: Stir in vanilla extract or a little coconut oil into the marshmallow mixture.
How to Make Mummy Rice Krispie Treats
This festive Halloween recipe comes together with simple steps.
Line a 9x13 baking pan with parchment paper and set aside.
In a large pot over medium-low heat, melt butter, then add marshmallows and lower the heat.
Stir constantly, to prevent sticking, until melted.
Remove from heat and pour in Rice Krispies. Stir quickly until evenly coated.
Transfer the mixture pan and press evenly (note: you can use some butter or spray on your hands or a piece of parchment or wax paper to prevent sticking).
Allow them to cool in the fridge for about 10-15 minutes then cut the treats into as many individual pieces as desired (I like to do a mix of sizes).
Melt white chocolate in a heat-safe bowl in either a microwave (incrementally) or over a double boiler. Allow it to cool just slightly to safely transfer to a piping bag, then a bit of the tip off to make a small hole at the end.
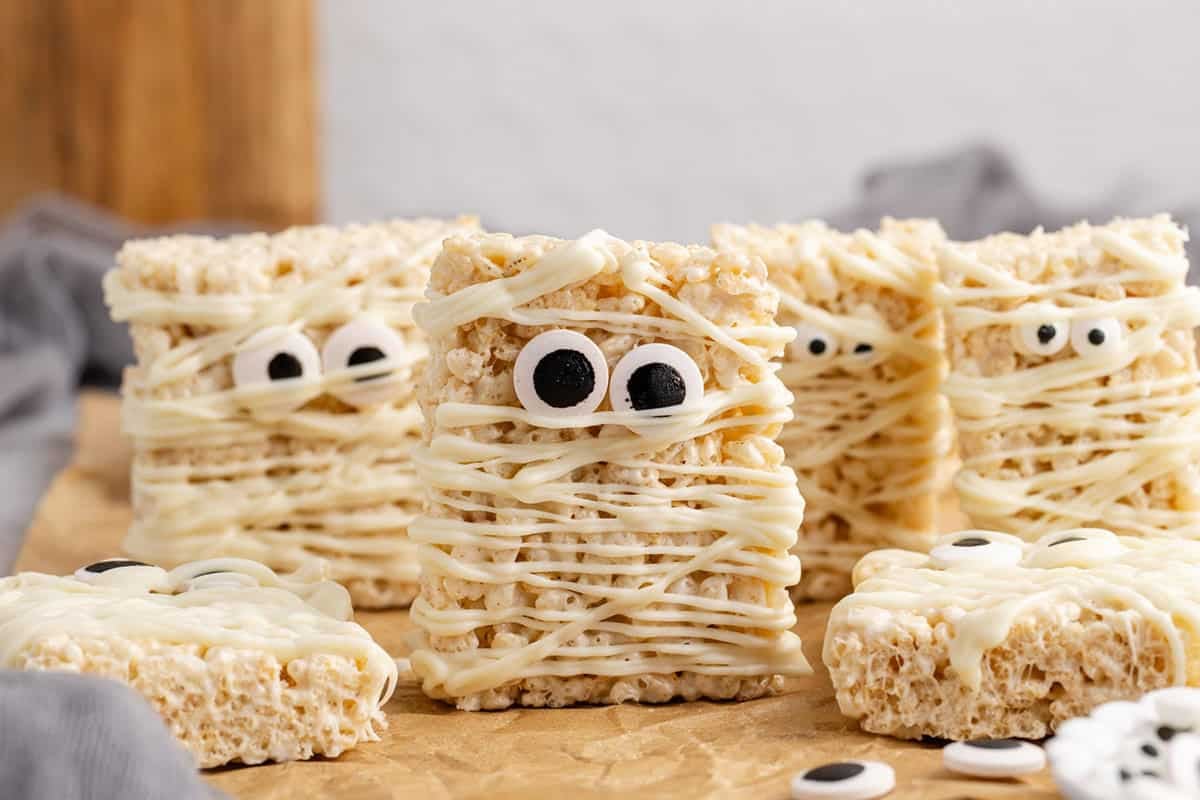
Using the white chocolate as "glue", stick the eyeballs in place, then drizzle back and forth to make bandages, covering as much as desired.
Hint: Use parchment paper or wax paper to line your pan for easy removal and clean slicing.

Recipe Tips
- Work Quickly: Press the marshmallow mixture into the pan while warm for best results. I like to use parchment paper to prevent it sticking to my hands.
- Use a Piping Bag: Snip a tiny corner of the bag for thin mummy wrap lines.
- Don't Overheat Chocolate: Melt in short intervals in a microwave-safe bowl for smooth drizzle.
- Add Eyes First: Stick candy googly eyes on before drizzling the bandages for a secure hold.
For a spooky snack on the savory side, our Mummy Hot Dogs are always a hit.
More Halloween Recipes


Storage Instructions
- Room Temperature: Store in an airtight container, out of sunlight for 2-3 days, depending on how warm your house is as you do not want the chocolate to melt.
- Refrigerator: Not necessary, unless your house is overly warm, but will keep them slightly firmer if stored up to 5 days. The eyeballs can start to sweat once out of the fridge.
Serving Suggestions
- Halloween Party Food: Halloween Sugar Cookie Bars, Leftover Halloween Candy Cookies, Halloween Sangria, Spider Cookies and Halloween Crockpot Candy.
Mummy Recipe Krispie Treats Recipe FAQs
Use a sharp knife lightly sprayed with nonstick spray or butter for the cleanest cuts. Chilling them in the fridge helps too.
Definitely. Keep un-decorated squares at room temperature or in the fridge for a couple of days, then decorate just before, for the most freshness.
Use chocolate chips or small candies as a substitute, the end result will still be cute Halloween mummies.

More Recipes

Ready to get cooking? Save time by having a grocery list automatically generate for you by clicking the "Add to Shopping List" below.
Mummy Rice Krispie Treats
Equipment
- Large Saucepan
- 9x13 Baking Pan
- Heat-Safe Bowl
- Parchment Paper
- Spatula
Ingredients
- 5 tbsp butter unsalted
- 12 ounces marshmallows
- 7 cups Rice Krispies cereal
- 6-8 ounces white chocolate melts
- candy eyeballs
Instructions
- Line a 9x13 baking pan with parchment paper and set aside.
- In a large pot over medium-low heat, melt butter, then add marshmallows and lower the heat.
- Stir constantly, to prevent sticking, until melted.
- Remove from heat and pour in Rice Krispies. Stir quickly until evenly coated.
- Transfer the mixture pan and press evenly (note: you can use some butter or spray on your hands or a piece of parchment or wax paper to prevent sticking).
- Allow them to cool in the fridge for about 10-15 minutes then cut the treats into as many individual pieces as desired (I like to do a mix of sizes).
- Melt white chocolate in a heat-safe bowl in either a microwave (incrementally) or over a double boiler. Allow it to cool just slightly to safely transfer to a piping bag, then a bit of the tip off to make a small hole at the end.
- Using the white chocolate as "glue", stick the eyeballs in place, then drizzle back and forth to make bandages, covering as much as desired.
Video
Notes
- Use parchment paper or wax paper to line your pan for easy removal and clean slicing.
- Press the marshmallow mixture into the pan while warm for best results. I like to use parchment paper to prevent it sticking to my hands.
- Snip a tiny corner of a piping bag or Ziploc bag for thin mummy wrap lines.
- If using the microwave, melt in short intervals in a microwave-safe bowl for smooth drizzle.
- Stick candy googly eyes on before drizzling the bandages for a secure hold.
- For larger cuts, 6 ounces of white chocolate works well. When making smaller cuts you create more surface area (on the sides), so bump to 8 ounces for full coverage.
Nutrition
We would be so grateful for you to leave us a rating and review on any recipes you try. If you make any alterations, let us know how they turned out.


My little guy loves making these. It is so fast to whip together and we sometimes use dark or milk chocolate too!